

About Drakensberg Hikes
Drakensberg Hikes is an independent community portal providing verified trail reports, sleeping cave logs, GPX tracks, and accommodation directories for the Maloti-Drakensberg World Heritage Site.
You have decided to go hiking in the Drakensberg. What do you do next?
Start with the people coming with you, choose a walk that suits the group, and work through the route, access, overnight arrangements and equipment. Good preparation gives you more time to enjoy the mountains and better options when the day does not go to plan.
The Drakensberg is wider than the World Heritage Site. The Maloti-Drakensberg Park includes South Africa’s uKhahlamba Drakensberg Park and Sehlabathebe National Park in Lesotho. Other mountain areas, including Mnweni, have their own custodians and access arrangements.
Before choosing your route: plan for your hiking group
A good hike is one that everyone can enjoy and finish with something left in their legs. Before settling on a pass, summit or overnight cave, talk about who is coming, what they have done before and what kind of day they want. A shorter walk with time for a swim and a long lunch can be a better choice than pushing everyone towards a distant summit.
Choose companions and a route that suit each other
Be honest about fitness, pack weight, comfort with heights and experience on rough ground. Fitness on a familiar trail does not necessarily prepare someone for a pathless slope, scrambling or a long descent with a full pack. If you have not hiked together before, try a shorter day walk before committing to a demanding overnight route.
Hiking with capable companions gives you more options when something goes wrong. A larger party still needs suitable experience and equipment. Check the actual route and booking conditions for group limits; cave sleeping space, hut beds and permitted party size are separate questions. For a first Berg trip, consider an established hiking club or a suitable local guide.
Agree who is doing what
Choose someone with the skills to lead the planned route, assess conditions and change the plan. Make sure everyone knows the route and alternatives. More than one person should be able to find your position and use the navigation equipment; the map and emergency plan should not exist only on the leader’s phone.
Agree who will check bookings, monitor the mountain forecast, carry shared equipment and act as the rear walker. Check that everyone has their own essential clothing, water and light, and that the shared shelter and cooking arrangements cover the whole party. Give the leader any relevant medical information privately. If children are coming, agree which adults are responsible for them.
Walk at a pace the whole group can sustain
Choose a steady pace that suits the slowest member, and keep the rear walker in contact with the leader. Wait at junctions and before entering mist or difficult ground. A head count at stops helps catch a separation early. Tell someone before stepping off the path for a toilet break or photograph.
Give slower walkers a proper rest when they arrive, rather than setting off as soon as they catch up. Speak up early about blisters, pain, cold or exhaustion. Adjusting the pace or shortening the route is easier while you still have time and energy to spare.
Decide when to change the plan
Set realistic decision times for the climb, turnaround and arrival at camp. Allow for navigation, water stops, slower descents and the actual daylight available. Review the plan if you start late or conditions deteriorate; reaching a summit is optional, getting everyone back matters more.
Plan a suitable cave where possible, with a realistic backup campsite or shorter route. Know how to reach the alternatives before you need them, and allow for water and the group’s remaining energy. Lessons from the Berg explains this planning in more detail.
Do not let different speeds turn into separate hikes
Keep the group together as your normal arrangement. Do not casually send tired or inexperienced hikers back alone while everyone else continues. Splitting a party also divides its navigation skills, shelter, first-aid supplies and communication equipment.
If separate parties are deliberately planned, each needs capable leadership, adequate equipment and a clear route, return plan and contact arrangements. Check that the permit allows it and that your home contact knows both plans. An emergency requires a fresh assessment; follow the mountain-rescue guidance rather than automatically sending someone away to find help.
Sort out transport and leave a usable trip plan
Agree the meeting point, vehicles, keys, parking and fuel costs. For a traverse, confirm the collection point and a realistic arrangement if you finish late or return another way. Download the access-road information before travelling and leave time for the approach.
Give a trusted person your route, party and vehicle details, overnight alternatives, expected return and an agreed time and method for raising concern. Complete the applicable entry and rescue registers, then sign out or report your return as instructed. Tell your home contact when everyone is safely back.
A quick conversation at the trailhead
- Does everyone understand today’s route and the shorter option?
- Who is leading, who is at the back, and when will we review progress?
- Where is the next water, and do we have enough to reach it?
- Can we all reach our warm layers, waterproofs and headlamps?
- Who has the maps, first-aid kit, shelter and emergency contacts?
- Does our home contact have the final plan, and are the registers complete?
Step 1: Choose your starting point
The Northern, Central and Southern Drakensberg offer very different days out. Use our region guides to compare entry areas, walks, accommodation and directions. Then check the approach in the access-roads guide. A short distance on the map can still mean a slow final drive.
Many entry areas are managed by Ezemvelo KZN Wildlife, but one booking system does not cover the entire mountain range. Start with the guide for the actual place you intend to enter:
- Ezemvelo reserves: use the local contact and booking links in the relevant region guide. Central Reservations is 033 845 1000; the official accommodation portal lists available booking categories. Ask separately about hiking permits, cave bookings and any access restrictions.
- Mnweni and neighbouring community areas: Mnweni is associated with the amaNgwane Traditional Authority Area; amaZizi is a distinct neighbouring area. Arrange the appropriate local access, parking, camping or guiding for your route.
- Sentinel Car Park: Witsieshoek’s operator information says the final road from the lodge requires a 4×4. Its shuttle runs between the lodge and Sentinel Car Park, rather than from the toll gate. Check the operator’s access arrangements and book transport if needed.
- Lesotho: use the Sehlabathebe guide when visiting that park. Plan the border, local access and emergency arrangements for your actual itinerary; a shared World Heritage designation does not remove international travel requirements.
For Ezemvelo visits from 1 November 2026 to 31 October 2027, our Drakensberg hiking and camping fees guide summarises the useful parts of the tariff schedule. Check the total for your dates and activity when booking.
Step 2: Choose your hike and arrange the overnight stop
Browse the hike listings for ideas, then study the distance, ascent, terrain and route description. A short walk on a maintained path and the same distance over a pass are very different outings. Leave time for breaks, navigation and the descent, with a shorter option if you are moving more slowly than expected.
For an overnight hike, decide whether you will carry a tent, book a suitable cave or use a hut. Plan the day around reaching your overnight stop with daylight and energy to spare.
- Caves: ask the responsible reserve or local custodian about bookings, permitted group size and overnight fees. Check the usable sleeping space and where you will collect water. A cave can be wet or offer less shelter than expected; carry appropriate backup shelter and know your alternatives.
- Huts: use the booking information in the individual hut listing. Giant’s Cup trail huts appear under specific trail selections in the official portal, while Bannerman is listed under Giant’s Castle. Other huts can have different arrangements. Confirm the exact hut and dates, rather than assuming a nearby campsite booking covers it.
- Camping: distinguish a campsite at the reserve from an overnight hiking permit for camping in the mountains. Ask where camping is permitted and whether your intended route or overnight area has any restrictions.
A place appearing in a booking menu does not confirm that its approach road or hiking route is open. For Injisuthi, read the flood-damage and access update and confirm restrictions before travelling.
Navigation: know more than the line on your screen
Carry a suitable hiking map and compass, and know how to use them. Study the contours, junctions, water points, pass approaches and escape options before leaving. Check that your map covers the whole route, including a retreat or alternative finish.
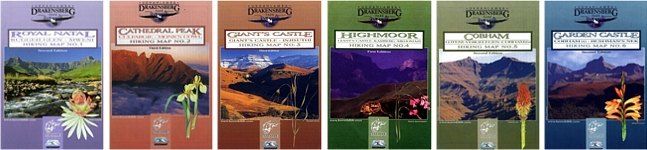
We have used BackCountry Navigator for offline maps and tracks. Whatever app or device you choose, practise with it before the hike. Download the maps and any GPX files in advance, then check that they open with mobile data switched off. Keep spare power available and protect the device from water.
A recorded track shows where someone travelled; it does not establish that the ground is safe, open or suitable for your group today. Paths can fade, river crossings change and mist hide the route. If the track and terrain do not make sense together, stop somewhere safe and work out your position before continuing. A phone is a useful navigation tool, but it should not be the group’s only one.
Registers and mountain rescue
Complete the applicable entry and mountain-rescue registers accurately, including your route, overnight stops, party details and expected return. Sign out or report your return as instructed. A downloaded register form helps you prepare the details, but saving a form on your phone does not register your hike.
For a KZN mountain emergency, MCSA lists 0800 205 334 (EMS) and the EMS duty cell 072 139 4091. Say clearly that it is a mountain-rescue emergency and give your location and callback number. MCSA states that its KZN team also assists in the eastern Free State; establish the appropriate local arrangements for other areas and for Lesotho.
Save our mountain-rescue contacts and reporting guidance offline before leaving. Call promptly when help is needed; do not delay an urgent call while repeatedly trying an unanswered reserve office. Leave your trip plan with a reliable person at home as well.
Step 3: Plan for the conditions and your overnight site
Read the Drakensberg Safety and Security Guide for area considerations and practical precautions. Ask local staff or your guide about recent conditions before starting. Historic incidents can inform preparation, but a line around an area on an old map cannot tell you where it is safe to camp today.
Where the route allows, plan for a suitable cave and identify a backup campsite. Check water, shelter, access and whether the overnight site is permitted. A cave does not remove the risk of theft, and a rock overhang should not be treated as lightning protection.
If you feel uncomfortable about a campsite or an encounter, having a known alternative beyond the next ridge can give you a useful option. Include it in the plan before leaving, with enough daylight and energy to reach it safely. Keep the group together and avoid turning a security concern into a dangerous crossing, steep descent or exposed camp. Judge people by their behaviour and the circumstances; someone being nearby does not by itself mean they intend harm.
Weather, rivers and navigation also affect safety. Check the mountain forecast for your route height, carry protection from cold and rain, and change the plan if conditions demand it. Do not enter floodwater or assume a pass will be straightforward because the valley weather is good. For winter preparation, use the snow and seasonal guide.
Lessons from the Berg brings these choices together: suitable caves, alternative campsites, decision times and acting before a difficult day becomes an emergency.
Step 4: Consider a guided San rock-art walk
A rock-art walk offers another way to experience the mountains. UNESCO describes an estimated 690 rock-art sites and probably more than 35,000 individual images across the Maloti-Drakensberg World Heritage property. Their value lies in the paintings, the stories they tell and their setting.
Browse our rock-art listings for background, then arrange access through the reserve or site manager. Amafa controls access to rock-art sites in KwaZulu-Natal and uses trained custodians for sites open to visitors. A directory listing or an ordinary hiking permit does not establish permission to enter a shelter. Confirm the site’s opening, custodian and any permit requirements when arranging the visit.
The photograph below shows paintings at Mpongweni (Sipongweni) North Shelter in the Cobham area. Plan an outing to suit the approach and the group, and arrange the required access before setting out.

Follow the custodian’s instructions. Do not touch, wet, trace or mark the paintings, and do not camp or cook in rock-art shelters.
Step 5: Pack for the route and a possible delay
Use the hiking checklist to work through clothing, footwear, food, water, navigation and overnight equipment. For broader introductions to equipment and food, browse our hiking information.
Even on a day walk, carry warm and waterproof layers, a headlamp, food, sufficient water for the route, suitable first-aid supplies and emergency shelter. Plan water refills and carry a way to treat drinking water. For an overnight hike, protect your sleeping bag and spare clothing in a pack liner or dry bags, and check the tent, stove and other shared kit before leaving.
Pack weight matters, but so does having what you need if you are delayed. Choose equipment for the actual weather, terrain and group rather than relying on a fixed packing list. Keep layers, snacks and water within reach.
Step 6: Leave time to enjoy the hike
Start early enough to walk at a comfortable pace, stop for the views and return with a margin for delays. Keep checking the group, the weather and your position. There is no need to turn every outing into a long, hard slog; a shorter hike with good company has just as much place in the Berg.
Follow Leave No Trace, take your rubbish home, complete the return formalities and let your home contact know everyone is safely back.
If you need help choosing an outing, contact Drakensberg Hikes with your starting area, dates, experience and the kind of hike you have in mind. For an emergency, use the rescue contacts directly.
⚠️ Mountain Safety Notice
Weather conditions in the Drakensberg escarpment can change within minutes. Always register your group in the official Ezemvelo Mountain Rescue Register before starting any overnight trail, carry gear for extreme cold/rain, and ensure you have verified offline GPS tracks.
Download Rescue Form (PDF)More Mountain Stories & Route Reports

Mnweni Hike

Rhino Peak: climbing the S Route

Highmoor to Aasvoëlkrans Cave

Giants Castle to Bannerman Hut and up Bannerman Pass

New Ladders to access the Amphitheatre
